Monday, November 28, 2011

Happy Advent!

We will be moving soon and I am sitting in my house with boxes stacked
high with more to packing to do.

 It is finally time to prepare my crafting supplies for transport to their new home!
Little do they know that our new home will have a room officially designated for them!

Since we will be in the midst of packing, moving and unpacking for the next several weeks I will be taking a break from blogging. 

Look for me to be back January 2012 with all kinds of new and fun projects
made in my new crafting room!
(I promise you will get to see pictures when that is done too!)

In the meanwhile have
a Happy Advent,
a Merry Christmas,
and enjoy ringing in the New Year with some style!

Friday, November 25, 2011

Fun on Fridays

Here is an oldie but goodie

Gingerbread house making layouts from 2007


Thursday, November 24, 2011

Wednesday, November 23, 2011

Words for Wednesdays

"Gratitude bestows reverence,
allowing us to encounter everyday epiphanies,
those transcendent moments of awe
that change forever how we experience
life and the world."

John Milton

Tuesday, November 22, 2011

Technique Tuesdays

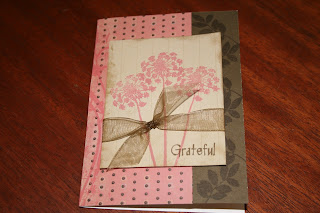
Yesterday's card showed a lovely simple technique:
Tone on Tone stamping

Just use your coordinating cocoa ink and cocoa paper - stamp your leaves
and Voila!

A beautiful rich tone on tone paper!

Monday, November 21, 2011

Mojo Mondays

As we approach our day of giving thanks,
let us all recall those people and things for which we are
GRATEFUL!


Friday, November 18, 2011

Fun on Fridays

(click on image to view larger)

Speaking of being Thankful!
Here is a layout I made about the day I married my wonderful Hubby!

Thursday, November 17, 2011

Tips for Thursdays

Today I don't have any pictures for you but I do have a great adhesive tip!

Glue Dots are great for sticking ribbon, buttons, chipboard
and other embellishments to your projects.  
But what do you do when you decide you need to adjust the embellishment and the Glue Dot has already adhered quite well?

Answer:
Grab your heat embossing tool, heat the dot and it will loosen up and come right up!

Wednesday, November 16, 2011

Words for Wednesdays

"Gratitude is when memory is stored in the heart
and not in the mind."

Lionel Hampton              

Tuesday, November 15, 2011

Technique Tuesdays

Yesterday I showed you this simple and sweet Thanks card
The "So Grateful" stamp set has the word image "Thanksgiving"
but I wanted to just stamp "Thanks."

So I grabbed my handy dandy Scotch tape and went to work .
First I covered "giving" on the stamp with a piece of tape.

Inked it up as normal


Pulled off the tape

and stamped the inked portion on my card.


Just another handy technique using something you always have on hand.

Monday, November 14, 2011

Mojo Mondays

Simple and sweet!
This 4"x4" Thanks card was a simple to make and inspired by the card in the
Close To My Heart Fall 2011 idea book for the So Grateful stamp set.

Come back tomorrow to check out the technique I used to alter one of the stamps in this set.  I promise you have this tool at home too!

Friday, November 11, 2011

Fun on Fridays

One of my friends at work is having a baby! 
A few of us threw her a shower and I was in charge of
decorations and the card.

Here is what I came up with!


I didn't make the cake but it is so stinking cute I had to share it!


Have a great weekend!


Thursday, November 10, 2011

Tips for Thursdays

This month's tips all revolve around adhesive.

Today I am going to show you a product
to use for sticking heavy metal embellishments to cards, layouts and 3D projects.
Although it is not make by CTMH it is the best one out there
so if you are looking for something to hold on a heavy metal item took for this little guy!


It is a Pioneer brand Extra Srong Embellishment Glue Stick.


Wednesday, November 9, 2011

Words for Wednesdays

"Gratitude is the sign of noble souls."

Aesop               

Tuesday, November 8, 2011

Technique Tuesdays

Yesterday we saw this pretty fall Thank You card.

Today I am going to show you how easy it is to create colorful leaves
using a variation on the rock and roll technique.

After stamping your wreath base
Choose a few shades of coordinating ink. 
Start inking leaves with your lightest color I used Honey,

next without stamping the Honey ink off the stamp dab your stamp in various places
on the image in the next lightest color - for me Sunset

and finally dab again in the darkest color - Vineyard Berry
Stamp the leaves on your wreath and then repeat the inking and stamping process until you get the look you like.

Easy, simple and very pretty!

Come back tomorrow for some Words for Wednesday about Gratitude!

Monday, November 7, 2011

Mojo Mondays

Since this is the month we think about gratitude
I am going to create Thank You cards!

You have seen this cute one in the past.
This time I am going to show you how I made the colorful leaves!
(click on picture to view larger)
Come back tomorrow to see a variation on the rock and roll technique!

Friday, November 4, 2011

Fun on Fridays

Did you know I once won a car?

The funniest part of the story is I won it at Wendy's!

Here is the layout I made about it.
(click on the image to view larger)


Have a great weekend!!

Thursday, November 3, 2011

Tips for Thursdays

There is no photo for this tip but it is super simple.

Imagine that you have a super cute CTMH Stickease that you want to
pop up off a card with foam tape. 

Your design concern is you don't want the parts of the Stickease
that are not covered by foam tape to stick to other parts of the card.

Here is the simple solution:

Take your Stickease and stick it to and pull it off of your jean pants leg
over and over. 

Just like a sticky name tag loses its stick by gathering lint from your shirt
by doing this several times your Stickease
will pick up lint and won't stick to anything except where you place your foam tape.

Wednesday, November 2, 2011

Words for Wednesdays

"Feeling gratitude and not expressing it
is like wrapping a present and not giving it"

William Arthur Ward            

Tuesday, November 1, 2011

Technique Tuesdays

Let me show you how easy and quick it was to make the
fabulous scarf accent on this card.
All you do is take a piece of white core card stock
and with your scoring blade you create scored lines at intervals that
create your desired look.

The distance between the smaller score marks was approximately 1/4"
and I just eyeballed the larger sections.

Next cut small scarf fringe at the unscored end with your micro tip scissors.
Finally use your handy dandy sanding block to expose the white core
on the raised side of the score marks and the fringe.
Here is what it looks like after the sanding

This cute accent is quick and easy way to add a "WOW" factor to any card!

Monday, October 31, 2011

Mojo Mondays

This is the last Monday in October so this is our last Christmas Card idea!

Check out this cute owl from the Bundled Buddies stamp set
He is one of a bunch of adorable scarf and sweater wearing woodland creatures!
I was inspired by a fellow CTMH consultant (whose name I could not find.)

Here are a few close ups


Come back tomorrow to see how I made the cute red scarf accent on the card!

Friday, October 28, 2011

Fun on Fridays

We are heading to a wedding this weekend!
The color for the wedding is gold so here is what I came up with
A little CTMH mixed with gold accents from Michaels

Here are a few close ups of the details


Have a great weekend!

Thursday, October 27, 2011

Tips for Thursdays

Here is another simple tip for a very versatile tool!

Use the opposite end of your paper piercing tool
to press your brads flat on your paper - like so

This helps reduce bulk and lumps when you put your project together.

Wednesday, October 26, 2011

Words for Wednesdays

"Friendship is a sheltering tree."

Samuel Coleridge               

Tuesday, October 25, 2011

Technique Tuesdays

Here comes Santa Claus
looking cute as ever!
Want to know how to make Santa beard and fur trim so fluffy and fun?

Liquid Applique! 
You just take your stamped image and squeeze while
you draw on your hair and fur pattern.


The Liquid Applique has a yellow tint when wet.
Now you break out your handy dandy heat embossing tool and heat it until
the Liquid Applique puffs up and dries nice and white - like so.


One of the really great things about this product is it can be used for so many different things - hair, fur, feathers, frosting - you name it.
Since it has a nice small tip you can choose how little or
much you want to put on your image
and even better since it can be tinted with reinker
if you really, really want pink frosting on your cupcake you can have it!


You should really ask Santa to bring you some Liquid Applique this Christmas!!